Pokazywanie postów oznaczonych etykietą US Navy. Pokaż wszystkie posty

czwartek, 25 maja 2023

Operacja MO - mini kampania Blood Red Skies


Operacja MO to minikampania w grze Blood Red Skies nawiązująca do walk jakie miały miejsce w 1942 roku w okolicach Nowej Gwinei. Gracze podzieleni są na dwie frakcje: Aliantów i Siły Zbrojne Cesarstwa Japonii. Gra rozgrywa się jednocześnie (domyślnie) na 4 stołach/lokalizacjach symbolizujących obszary znajdujące się pod kontrolą każdej ze stron.

Lokalizacje będące własnością zespołu japońskiego: 

(1) Lae: teren dżungla z zespołem lotnisk i stacją radarową, 

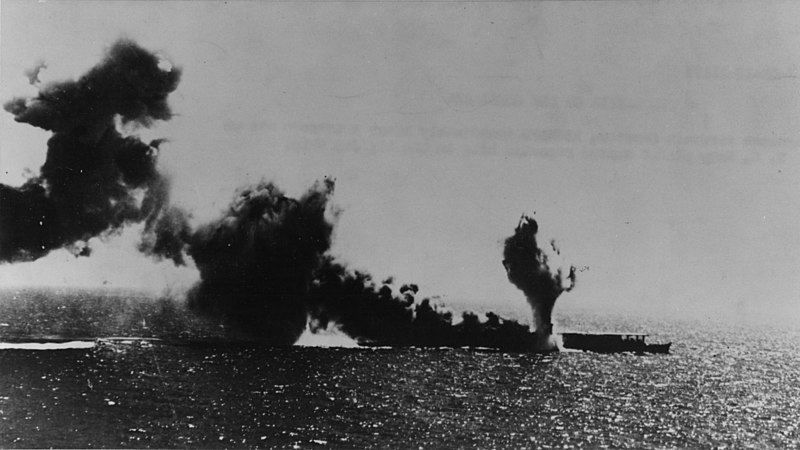
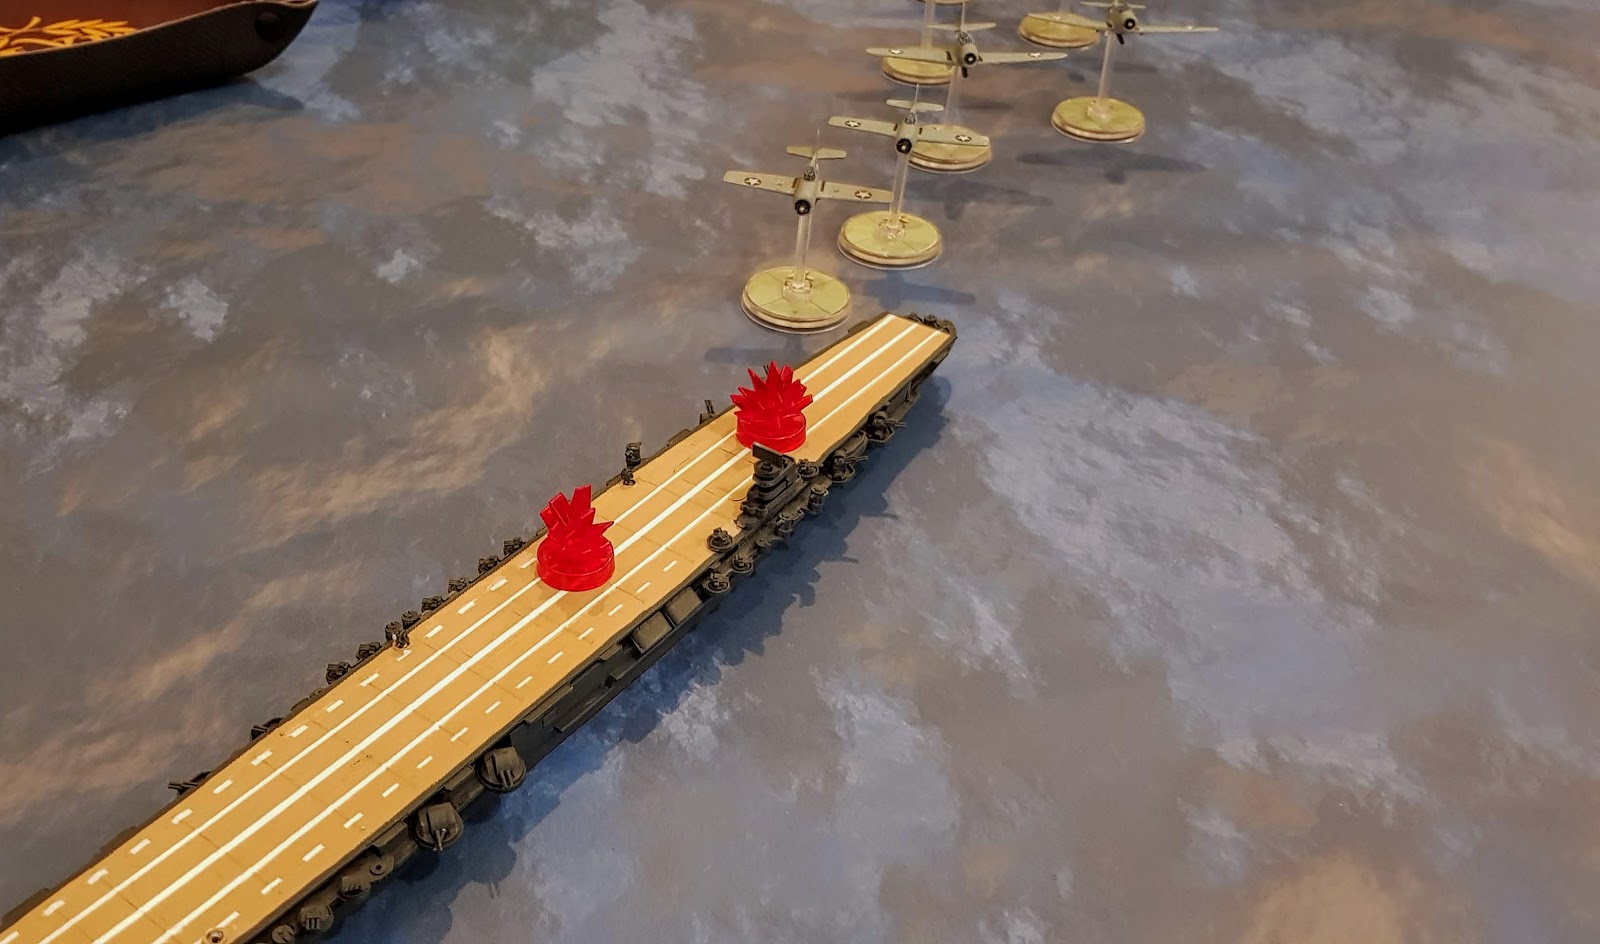
(2) Morze Salomona: teren morski z flotą zespołem lotniskowców i zespołem desantowym (transportowym) jako potencjalnymi celami.

Lokalizacje będące własnością zespołu alianckiego: 

(1): Port Morsby: teren dżunglowy z zespołem lotnisk i stacją radarową, 

(2) Morze Koralowe z zespołem lotniskowców i zespołem zaopatrzeniowym (transportowym) jako potencjalnymi celami.

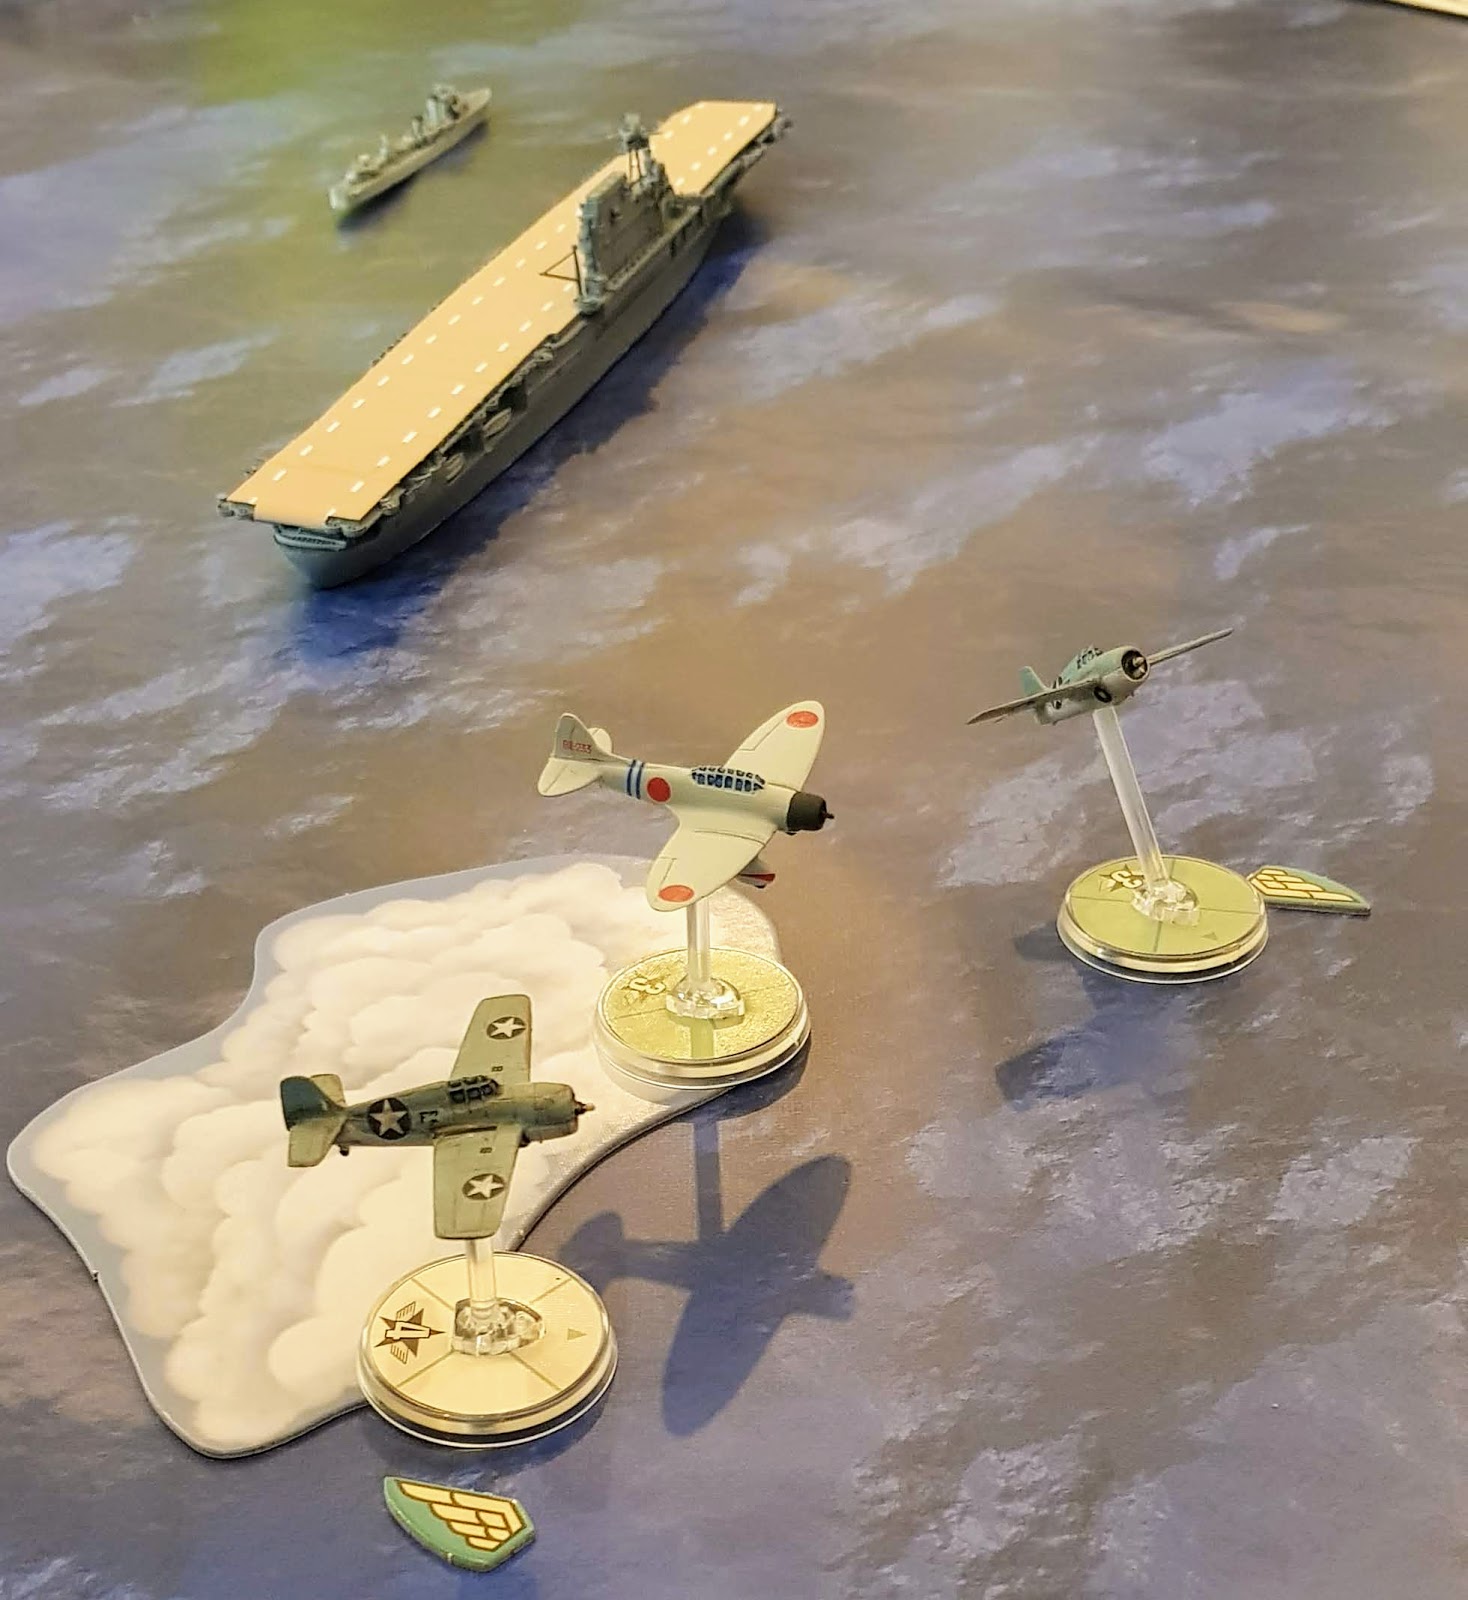
Każda ze stron dysponuje liczbą squadronów myśliwskich równą liczbie graczy (domyślnie 4 na stronę) o wartości 500pkt. UWAGA: W grze mogą brać udział samoloty do 1942 roku włącznie.

Na stronę przypadają także: 1 squadron bombowców horyzontalnych dwusilnikowych (wartość 200pkt), 1 squadron bombowców nurkujących (wartość 350pkt), 1 squadron samolotów torpedowych jednosilnikowych (wartość 350pkt), jedna dwusilnikowa łódź latająca (wartość 75pkt). UWAGA: na wartość squadronu składa się wyłącznie wyszkolenie pilotów. 


Każda ze stron dysponuje pulą punktów zasobów (PZ) równą liczbie graczy pomnożonej przez 3 (domyślnie 4x3 =12 pkt na stronę). Pula ta może być wydatkowana na uzupełnienie strat, naprawę instalacji lub „płacenie” przeciwnikowi za porażkę w bitwie.

Cel gry:

Celem gry jest osłabienie zasobów przeciwnika. Gra kończy się Strategicznym zwycięstwem strony, która pozbawi przeciwnika wszystkich punktów zasobów, lub Taktycznym zwycięstwem gdy po 3 bitwach dana strona ma przewagę punktową nad przeciwnikiem.

Punkty zasobów (PZ): Za zwycięstwo w scenariuszu strona przegrana „płaci” (wydaje) 1PZ na rzecz drużyny przeciwnika. Za naprawę własnego lotniska/lotniskowca/celu naziemnego/transportowca strona wydaje 1PZ. Za każde 100pkt samolotów zniszczonych w czasie danej sekwencji bitew (czyli łącznie na wszystkich mapach) zaokrąglając w dół strona wydaje 1PZ. Za każde 100 pkt pilotów straconych łącznie w danej sekwencji bitew (zaokrąglając w dół) strona przekazuje przeciwnikowi 1PZ. 

Jeżeli w trakcie bitwy zostanie stracony as wykonywany jest test szansy jego przeżycia. Gdy został zestrzelony nad własnym terytorium as pozostaje w grze po rzucie K6: 4+, jeżeli nad terytorium przeciwnika po rzucie K6: 6+. Jeżeli as posiadał zdolność Comeback King wynik K6 modyfikowany jest o +1. As stracony nie może zostać odzyskany. Gracz zmienia skład swojego squadronu aby uwzględnić ten fakt (bez dodatkowych kosztów w PZ).

Wyszkolenie pilotów bombowych jest kwestią wyboru graczy. Kluczowe jest aby suma pkt (w pilotach) była zgodna z założeniami. W grze dopuszczone są asy bombowe. 


Przebieg gry:

Gra składa się (domyślnie) z sekwencji 3 bitew rozgrywających się na 4 stołach. Zatem w wariancie domyślnym w grze bierze udział 8 osób. Można ją jednak skalować wzwyż i zmniejszać do minimum 2 stołów (po jednym stole na stronę).

Karty rozkazów: Każdy z zespołów graczy (Alianci, Japończycy) dysponuje w czasie gry kartami rozkazów w liczbie odpowiadającej liczbie stołów (zatem w wariancie domyślnym: 4 rozkazy na stronę). Połowa to rozkaz Atak, druga połowa to rozkaz Obrona. W przypadku nieparzystej liczby stołów Japończycy mają przewagę rozkazów Ataku. Jako karty rozkazów mogą zostać użyte karty do gry: gdzie figury symbolizują rozkaz Ataku, a blotki rozkaz Obrony; w wariancie czerwonym dla Japończyków i czarnym dla Aliantów.

Przed rozpoczęciem bitew zespoły/strony decydują o tym, na których planszach jakie rozkazy będą przydzielone. Wybór danego rozkazu na danej planszy (a ściślej kombinacja rozkazów przydzielona przez każdą ze stron) decyduje o tym jaki scenariusz/scenariusze mogą zostać rozegrane w tej lokalizacji w danym momencie. Szczegóły przedstawione są w tabelach poniżej

Atakujący – Obrońca

Kto decyduje o wyborze scenariusza

Atakujący

Dostępne scenariusze:

Gdy właścicielem mapy Obrońca

Gdy właścicielem mapy Atakujący

Scout mission (R)

Bounced (F)

Priority target (B)

Surprise attack (B)

Targets of Opportunity (B)*

Transport Hunt (B)

The way home (B)

Fighter sweep (F)

Obrońca – Obrońca

Dostępne scenariusze:

Dogfight (F)

Atakujący – Atakujący

Kto decyduje o wyborze scenariusza

Właściciel mapy

Dostępne scenariusze:

Dogfight (F)

Fighter Sweep (F)

Bounced (F)

R – w trakcie tej misji gracz będzie mieć szansę zidentyfikować położenie i rozpoznać infrastrukturę przeciwnika. Cele pozostają swoich miejscach do końca kampanii

F – misja myśliwska

B – misja bombowa, może być przeprowadzona o ile jest co najmniej jeden rozpoznany cel na tej mapie (wyjątek: scenariusz Targets of Opportunity).

Karty teatrów i karty pogody. Do każdej z map przypisane są 4 karty pogody i po 3 karty teatrów dla Atakującego i Obrońcy. Karta pogody losowana jest przed każdą z bitew. Z puli kart teatrów każdy z graczy wybiera potajemnie jedną, która będzie obowiązywać w danej grze. W przypadku kombinacji Atakujący-Atakujący lub Obrońca-Obrońca pulę Atakującego wybiera właściciel mapy.

Zniszczenie/uszkodzenie celu: skuteczny atak na cele naziemne/nawodne może owocować ich uszkodzeniem lub zniszczeniem. Cel uszkodzony/zniszczony pozostaje taki dopóki nie zostanie naprawiony (kosztem 1PZ).

Gdy w czasie gry zostanie zniszczone lotnisko lub lotniskowiec przeciwnika strona przeciwna otrzymuje specjalną kartę teatrów Restricted Airfields, która może zostać zagrywana na jednej z map jako dodatkowa do wyboru karta teatrów.

Gdy zniszczony zostanie statek transportowy strona przeciwna otrzymuje kartę Supply Shortages, która może zostać zagrywana na jednej z map jako dodatkowa do wyboru karta teatrów.

Gdy w czasie gry zostanie zniszczona stacja radarowa przeciwnik traci kartę Radar Support spośród kart teatrów dostępnych w tej lokalizacji.

Skutki związane ze zniszczeniem celów naziemnych/morskich są anulowane w momencie ich naprawienia.

Każda z sekwencji gier trwa maksymalnie 1 godzinę.

sobota, 19 września 2020

Sink the Shoho! - scenario for Blood Res Skies


This scenario is inspired by events that took place 7th of May 1942 near Misima Island. Japaneese main assault Force heading Port Moresby was noticed by the US reconnaissance units. The fleet consist of one light carrier Shoho, four heavy cruisers and some minor ships was attacked by the bombers USN TF17. 

The Americans managed to make attack by surprise. Limited CAP tried to engage US bombers, when the other Zero and Claude fighters tried to take off under enemy fire. Japaneese fleet lined up in tied, diamond like formation with a cruisers settting up heavy flak barrage.

Opposing forces:

US NAVY airforce consist of three squadrons: 6 Dauntless dive bombers (regular), 6 Devastators torpedo bombers (regular), 3 Wildcat fighters (regular) is an attacking force. Primary target for the attacker is to sink enemy carrier. Secondary target is to make as much damage on other Japaneese ships as possible.

Japaneese fleet and Navy airforce consist of 1 carrier, two cruiser ships, up to six A6M2 Zero fighters (regular) and - optional - six D3A Val as a substitute fighters (rookie) ist considered to be defender.

Deployment sequence

At the begining, defender player places carrier marker (it could be 10" long marker or a model - I'm using 1/700 ones) in the center of the 4'x4' table. 12" from each side of the carrier place cruisers markers. Then attacker places his squadrons in minimum 2 aircraft elements 1" from the any table edge (the player may choose initial advantage level). When the attacking force is deployed defender may set up his flak barrage: 4 per each ship. The player can use it against high operating targets (flak barrage) or huging the waves (splash barrage).  At the end defender places element consist of 2 Zeros in High cover on any table edge. The rest of Japaneese fighters are "on deck"  and may take off after actication of all aircrafts on table.

Special rules

Instant take off: When the all other planes on table are finished, the defender player may try to take off with up to two fighters (within a limit). To do so he need to make a maneouvre test for each plane. If succesfull place the model 1" from the carrier prow in disadvantage state. 

Staffing deck: the attacker may choose to make a straffing attack against carrier deck. For each success remove one Japaneese fighter being there. 

Evasive actions: at the begining of any turn defender plyer may decide evasive actions for his carrier. For each succesfull attack this turn you need to roll D6. On 4+ the hit is scored as normal, otherwise is dodged by the carrier. Aircrafts cannot take off from the carrier making evasive action the same turn.

No hope for retreat: Enemy attacking home deck. Japaneese fighter squadron in this scenario is unbreakable. 

Victory: 

Sinking of Shoho means automatic attacker victory, breaking all bomber squadrons (without sinking Shoho) means defender victory. In any other case sum up Victory points: 1VP for each inflicted Boom chit, 1VP for each inflicted hull hit.

Optional rules

Battle plan: Before deployment attacker dividing his force into battlegroups and secretly writing down targets for each of them. To determine the victor in this option the players need to sum up the victory points (defenders as above), attacker double his VP for each objective completed and deduct the value of VP for not completed objecitves. Battlegroups cannot attack other target than appointed at the begining of battle.

poniedziałek, 17 sierpnia 2020

Scout mission - BRS scenario


This scenario was inspired by the first phase of Midway battle when each fleet tried to search for the enemy. 

The scenario took place over the ocean. Attacker side use a single airplane use for reconnaissance. It is recommended to use a special one as for example PBY Catalina but of course the players are free to choose for this mission any other airplane.

Defender has a pair of carrie based fighters and ... a hidden warship somewhere nearby.

Deployment sequece:

The defender place the fighters (regular) in the High cover at any point of any edge. Then the Attacker place the Scout plane (Veteran) 6" from any edge (9" if the plane is multiengine). 


Game length:

The scenario continuous until the Scout plane is lost/driven off or the fleet is spotted and examined


Victory:

The game ends with decisive victory of scout player when he manage to successfully: spot and examine the target. If the scout plane is destroyed or driven off the game ends with decisive victory of defender, another is a draw

Scpecial rules:

Spotting: the scout plane can use a special spotting action during Pilot Action phase. 

Make a Pilot test 

+1 dice if the scout plane is multipersonel

+1 dice if the scout plane is special reconnaissance aircraft (i.e flying boat or hydroplane)

-1 dice for one man airplane

-1 dice for overcasting (more than 4 cloud markers)

If the test is successful roll 3D6 + scatter and place a token in the proper length and direction from the scout plane base. 

Examine: the spotted fleet should be examined to submit a full report. When the fleet token is within the 6" the scout plane can make another pilot action (Examine). Make a Pilot test with all modificators above plus:

+1 dice if the scout plane is disadvantaged

+1 dice if the scout plane is multipersonel

+1 dice if the scout plane is special reconnaissance aircraft (i.e flying boat or hydroplane)

-2 dices if the token is under the cloud

When the test is successful you can exchange the token with a proper ship model. 

Optionally you can use another action as Reporting. In this case to gain decisive victory the scout plane need to submit report to base. During the Pilot action the player can make a Reporting special test. Use the all modifiers from the spotting action plus:

-2 dices if the scout plane is disadvantaged

+1 dice if the scout plane is Advantaged

+1 dice if the scout plane is multipersonel

+1 dice if the scout plane is special reconnaissance aircraft (i.e flying boat or hydroplane)


PBY Catalina stats

Nation: US, Dutch, British, Australian, Canadian, Soviet
Date of production: 1939
Speed: 4 (196mph)
Agility: 0
Firepower: -
Traits: multiengine (2), Flying boat, Robust, Turret (360 Fp1)


środa, 22 kwietnia 2020

Pearl Harbor - BRS solo scenario


Are you bold enough to get in to the dragon's lair and stole some of his treasure? If so you are in a good position to start war against United States of America. Unleash power of your bombers and sink US Navy in her harbor.

This is solo scenario for Blood Red Skies game inspired by Japaneese operation against US fleet in Pearl Harbor. The player's goal is to sink the proud of US Navy: USS Arizona with a squadron of torpedo or dive bombers. You need to attack by surprise before enemy host of flak would respond.

The scenario is played on the table of 36"x 21'' which represent US base of Pearl Harbor. Main part of the map is port channel (flat terrain), 15" wide. On both sides there are 3" wide strips of Urban terrain (port). By the bank (both sides) there are light Flak (2points strong) positions (6" one from another). 


The main target: USS Arizona battleship is placed by the bank in the center. You can use a proper model (I prefere 1/700 scale which suits well to a wargame table), or, if none is available you can use a token 10" long. In the middle of the channel is placed USS Show destroyer. 


Japaneese squadron may appear on the table in elements (minimum 1) from any edges except South (where the battleship is berthed). You can free to devide your force and attack from different directions. You can also keep some force in reserve and unleash it in the subsequent turns. All your planes have to be the same type, all you plane have to start game with the same advantage level (players choice).

The attacking force
You can free to choose dive bomber squadron of six D3A Val or torpedo squadron of B5M Kate. Five pilots with regular (3) skill and one veteran (4). There are no trait, theatre or doctrine cards. Any bombing runs are following the Air Strike rules

Victory conditions:
For each hull hit in USS Arizona: +1VP 
Additionally for sinking USS Arizona: +1VP
For sinking USS Show: +2VP (allowed only when primary mission objective is completed)
For each Flak position destroyed: +2VP (allowed only when primary mission objective is completed)
For each plane lost: -2VP 

The game ends when all planes drop their ordnance or are forced to retreat.


Special rules:

Surprise attack: at the end of each turn the enemy may try to raise alert. Roll 3D6 + modifications. If any "6" is rolled All flak units are considered to be active
+1dice for any plane closer then 6" to any flak position (inluding ships).

+1dice for every turn (starting with second)
-1dice if all planes are disadvantaged
The alert is automaticly raised when any attack is commenced.

Flak:
Each active flak open fire to the closest plane (regular dodge regulations are in use including deflection shooting) within range (6") at the end of each turn. Additionally Flak units counterattack any bomb (or torpedo) run in regular way. Due to tight area ships doesn't use Flak barrage, only regular light flak. Flak units are considered as a Artillery position for a bomb run purposes.

Optional rules
USS Shaw on the move: to give your attack more thrill you can choose to set up USS Show in the random (use
dices) position after Japaneese party appears.   

sobota, 28 marca 2020

poniedziałek, 10 czerwca 2019

Midway 77th anniversary - battle report


 On June the 7th we celabrate 77th anniversary of Midway battle. We were basing on "Flat Tops in a Blood Red Sky Bath Tub" scenario. US Navy with USS Enterprise faced Japan Imperial Fleet with IJN Zuikaku.
Each side had at disposal 6 plane flight of fighters (F4F Wildcat vs. A6M2 Zero), 6 plane flight of recce/bombers (Dauntless Aichi Val) and 6 plane flight of torpedo bombers (Davastators vs Kates).

Each side consist of 3 determined commanders started with strategy thinking:
How to divide a force for defensive and offensive duties? How to deal with on-board logistics? How to localize enemy first?

As Americans we decided to bet on balanced strategy. Our plan was to have permanent cover of our carrier, each turn two bombers to be send for recce duties to localize Japanese. Torpedo bombers were on-ready waiting for orders to run. That was the plan


First turn wasn't succesful for us. None of our planes found an enemy. Unfortunately above our fleet a Japaneese plane appeared. Two Wildcats were sent for interception. Enemy did evasive actions between the clouds. Poorly trained american pilots haven't engage Japaneese. Our position was confirmed and we expect a bombing run next hour


Being desperate we sent all available dive bombers next hour for recon mission. Unluckily none of them found enemy carrier. Pair of fighters cover USS Enterprise when the previous one Returned to Base and next one was on ready for duty. Meanwhile the sky above our carrier was clear. Enemy never appeared.


Next hour passed. Two of our recce airplanes just landed when other four were Ruturned to Base. There was none more to send searching enemy carrier. Two Wildcats took off to cover flying base
 when finally enemy airraid appeared.

First wave consist of 6 Kate's supported by a flight of Zero's. Two Wildcats tried to brak through to bombers but Japaneese fighters efficiently engaged US fighters. One of them fell in flames to the ocean.


The way to our carrier was open. Japaneese bombers one by one started their attack run. US flak set up a wall of fire. Half of enemy bombers were lost. Three others released their duty. One of torpedoes reached the target.


While torpedo bombers faded away the second attack was carried out. Japaneese bombers dive precisely into the target. Another hit was scored. USS Enterprise was badly damaged but could still operate.


Fortunately the main deck was operational. Firefighters put out the fire just in time to take returning recce planes.


Having some time to second Japaneese attack we send away just prepared recce units and after a while one of them reported the contact. Enemy carrier IJN Zuikaku was temporarily unarmed, so Dauntless returned to base safely. Meanwhile Devastators and Dauntlesses were elevated on deck and placed on start position.


US air force was released for identified enemy. Zuikaku was uncovered still. Our Wildcats straffed over the deck to overpower enemy flak. Then our bombers one by one released their duty. Two torpedoes reach the target and exploded in the Zuikaku's side. Enemy carrier was badly damaged but haven't sink yet. There was a chance to finished her when the second wave of attack appeared. Unfortunately Mc' Clusky's boys didn't do right. None of the bombs reached the target. Zuikaku was still operational and just preparing planes for the next strike.


Our strike force was returning to base, one of fighters stood on deck when two other were readied in hangar. The sky over USS Enterprise was empty.


Our strike force just landed and single Wildcat was sent to the air when the Japaneese appeared. Two more fighters that shoud be available just broke down. Single Wildcat came to engage the enemy. Unfortunately Japaneese fighters swept away our defence and enemy gain an open gate to US carrier. First wave consist of 3 torpedo bombers did not succeed. Our spirit rose again. But then a second wave appeared. Three dive bombers fell from the sky and each of them place the bomb direct in target. There was no more hope for USS Enterprise. She sank quickly. HMAS Vampire rescued as many personel as could. Japaneese were triumphed, but we will get them soon!